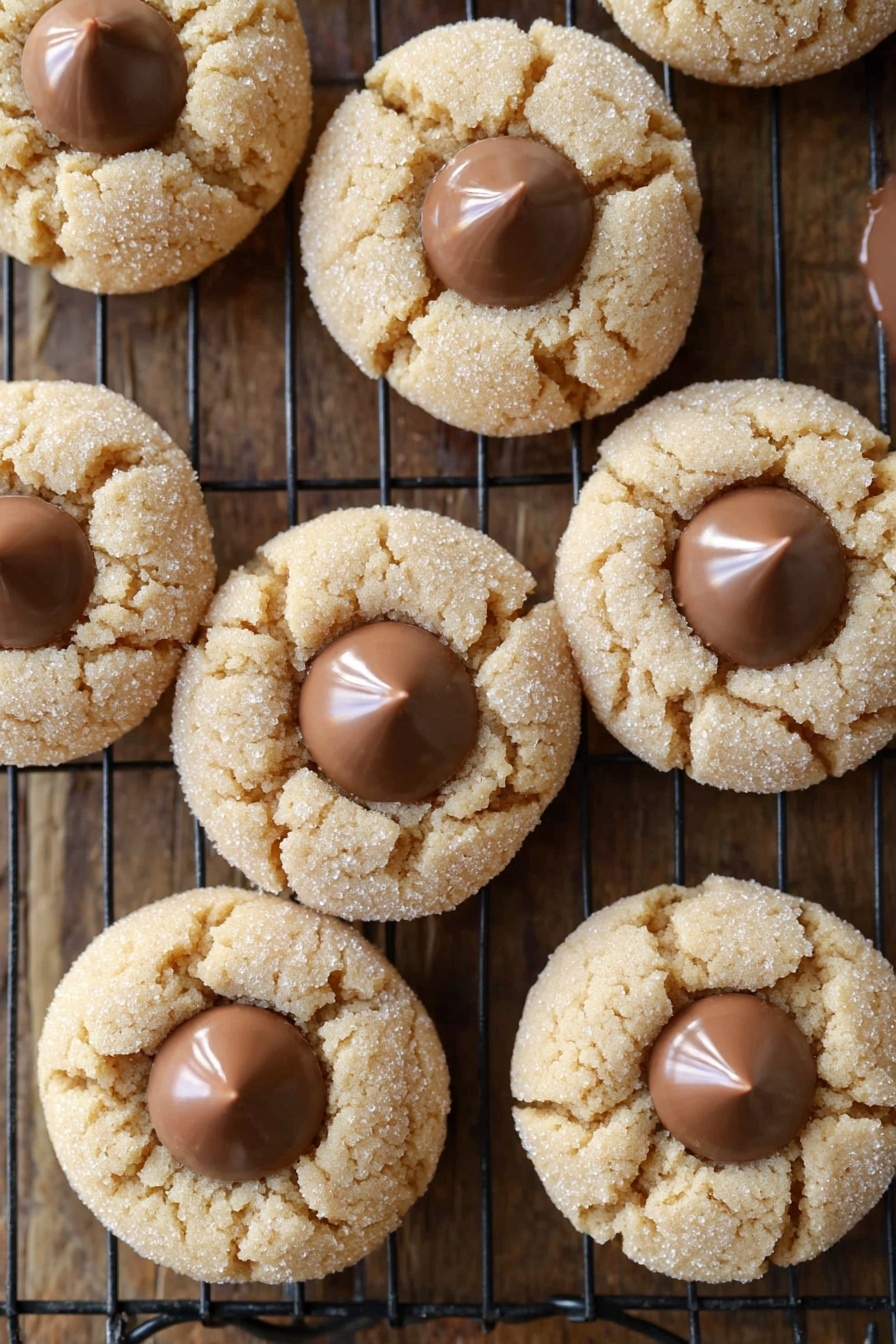
There’s something incredibly comforting about watching the shiny chocolate kiss melt ever so slightly atop a warm, soft cookie. This Classic Peanut Butter Blossoms Recipe is a timeless favorite that never disappoints. Its perfect balance of peanut butter richness and sweet chocolate-y goodness is what makes it truly special.

Jump to:
Why You'll Love This Recipe
I’ve made plenty of cookies over the years, but these peanut butter blossoms hold a special place in my heart—and kitchen. From first bite to last crumb, it’s a cookie that brings smiles, warm memories, and just the right amount of nostalgia. Plus, it’s surprisingly easy to whip up.
- Perfect Texture: Soft and chewy cookie centers with just a hint of crisp edge, making every bite delightful.
- Iconic Chocolate Topping: The classic chocolate kiss on top adds that perfect finishing touch you can't resist.
- Simple Ingredients: No fuss, pantry-friendly ingredients that are easy to find and come together quickly.
- Great for Gifting: These cookies look as good as they taste, making them ideal for holiday plates or thoughtful presents.
Ingredients & Why They Work
The ingredients in this Classic Peanut Butter Blossoms Recipe create a lovely balance of flavor and texture. Here’s my take on why each plays an important role and some tips for picking the best options.
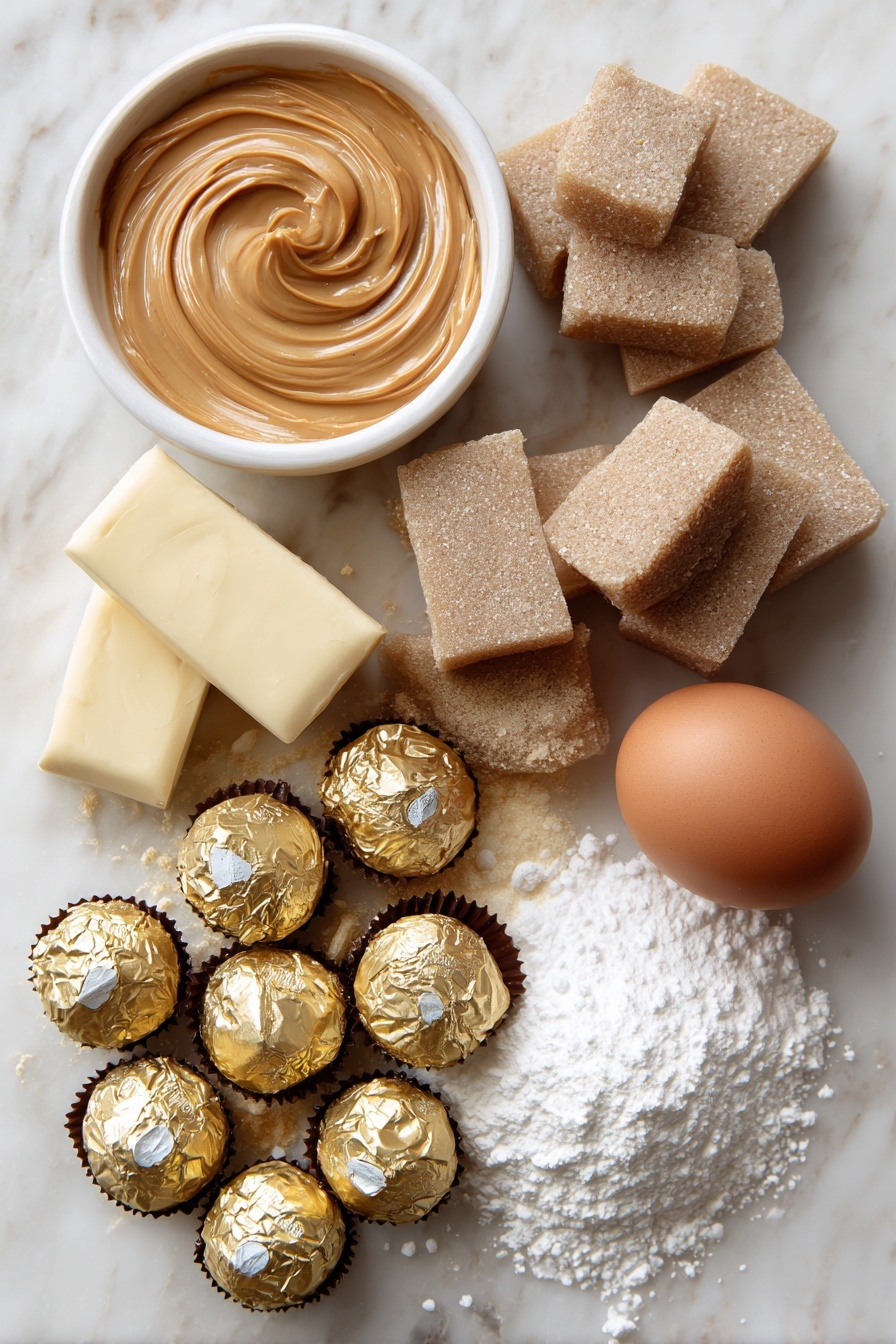
- Granulated Sugar: Used to sweeten and also rolled around the cookie dough balls to create a shiny, crackly finish—classic for these cookies.
- Brown Sugar: Adds moisture and a subtle caramel note that deepens the flavor and keeps the cookies soft.
- Creamy Peanut Butter: Go for smooth peanut butter for the best even texture; natural peanut butter can cause messiness due to oil separation.
- Unsalted Butter: Softened (not melted!) butter is key for a tender crumb and rich flavor without overpowering saltiness.
- Large Egg: Brings the dough together and adds moisture for that perfect chewiness.
- All-Purpose Flour: Provides structure while keeping cookies delicate and soft—not cakey, but just right.
- Baking Soda & Baking Powder: These leaveners work together to give just enough rise and lift without losing the cookie’s dense, chewy nature.
- Salt: Enhances the peanut butter flavor and balances the sweetness.
- Chocolate Candy Kisses: Classic Hershey’s are my go-to—they melt just right and give that iconic look and taste.
Make It Your Way
This Classic Peanut Butter Blossoms Recipe gives you a great base, but there’s plenty of room to make it your own. I love experimenting with added sprinkles or swapping out the chocolate kisses for white chocolate or flavored varieties—it's fun to find your favorite combos!
- Variation: Sometimes I swap creamy peanut butter for chunky to add an extra crunch and texture contrast—totally changes the cookie’s feel in a good way.
- Dietary Adjustments: You can try natural peanut butter and a little extra flour to help keep dough consistency, or use dairy-free butter alternatives for a vegan twist.
- Seasonal Flair: During holidays, rolling dough balls in colored sugar or edible glitter makes the cookies festive and perfect for gift packages.
Step-by-Step: How I Make Classic Peanut Butter Blossoms Recipe
Step 1: Mix the Sugars, Butter, Peanut Butter, and Egg
Start by creaming together the brown sugar, granulated sugar, peanut butter, softened butter, and egg using an electric mixer on medium speed. Here’s a little tip: make sure your butter is softened but not melted—this helps get a light, fluffy mix. I usually set the butter out about 30 minutes before baking.
Step 2: Add the Dry Ingredients
Turn the mixer to low and mix in the flour, baking soda, baking powder, and salt gradually. I like to add the dry ingredients slowly so the flour doesn’t cloud up my kitchen! You’re looking for a dough that’s soft and slightly sticky, not dry.
Step 3: Shape and Sugar the Dough Balls
Form the dough into 1-inch balls—this is easier if your hands are lightly floured or chilled—and roll each in granulated sugar. This sugar coating creates that slightly crackled, delightful exterior. Place them 2 inches apart on an ungreased cookie sheet because these cookies don’t spread out much.
Step 4: Bake and Add the Chocolate Kisses
Bake at 375°F, one cookie sheet at a time, for 8-10 minutes until the edges turn a soft golden brown. Here’s a pro tip: don’t overbake—these cookies finish baking outside the oven.
Once out of the oven, gently press a chocolate candy kiss into the center of each hot cookie. I learned that pressing too hard can flatten cookies, so a light push is all you need. Leave the cookies on the baking sheet to cool so the chocolate can set beautifully.
Step 5: Cool Before Enjoying
Patience here pays off—the cookies taste best once the chocolate has set, about an hour. I sometimes sneak a warm one right after baking, but the full flavor and texture really shine once cooled.
Top Tip
I’ve baked this Classic Peanut Butter Blossoms Recipe dozens of times, and a few things have helped me consistently nail these cookies every time. Follow these tips, and you’ll impress your crowd, too.
- Butter Temperature: Softened, not melted butter is a game-changer for proper texture and dough consistency.
- Don’t Overbake: Remove cookies when edges are just lightly golden; they finish cooking on the hot baking sheet.
- Roll Dough Balls in Sugar Thoroughly: This helps create that signature crackled outside and adds a bright sweetness.
- Press Chocolate Gently: Avoid pushing the kiss too far in; just light pressure is enough to set it beautifully.
How to Serve Classic Peanut Butter Blossoms Recipe
Garnishes
While the classic chocolate kiss is perfect on its own, I sometimes add a sprinkle of flaky sea salt right before baking for a sweet-salty twist. For holidays, a dusting of edible glitter or colored sanding sugar adds a playful sparkle that’s especially charming.
Side Dishes
These cookies pair beautifully with a tall glass of cold milk, naturally. I also enjoy serving them alongside coffee or hot cocoa, especially during chilly weather. For a party, they’re fantastic with a simple fruit platter to balance the sweetness.
Creative Ways to Present
For gift-giving or special occasions, arranging the cookies on tiered trays garnished with fresh mint leaves and mini candy canes adds a festive touch. Wrapping them in clear cellophane bags tied with rustic twine is my go-to for sharing with neighbors and friends.
Make Ahead and Storage
Storing Leftovers
Once completely cooled, I store leftovers in an airtight container at room temperature for up to four days. Keeping them sealed well is key to maintaining their softness and that irresistible chewiness.
Freezing
I usually freeze the dough balls before rolling in sugar, tightly wrapped in plastic and stored in a freezer-safe bag for up to three months. When I’m ready, I just thaw slightly and roll in sugar before baking. You can also freeze baked cookies, but dough freezing preserves freshness best.
Reheating
If you want to enjoy them warm after storing, a quick 10-second zap in the microwave works wonders. It softens the cookie and slightly melts the chocolate, just like fresh out of the oven. Just don’t overheat or the cookie can become tough.
Frequently Asked Questions:
Natural peanut butter can be used, but you'll want to add slightly more flour since natural versions are oilier and can make the dough too soft to handle easily. Also, chilling the dough before rolling helps.
Press the chocolate kisses onto the cookies immediately after removing them from the oven while the cookies are still warm but not hot enough to melt the kisses completely. This lets the chocolate soften slightly and stick without losing shape.
Yes! Substitute the all-purpose flour with a gluten-free flour blend that’s meant for baking. Make sure it contains xanthan gum or similar binder for the best texture. You might notice a slightly different crumb but still delicious.
Stored in an airtight container at room temperature, these cookies stay soft and fresh for up to four days. For longer storage, freezing the dough or baked cookies is recommended.
Final Thoughts
Every time I bake this Classic Peanut Butter Blossoms Recipe, it brings a little extra joy and warmth into my home. I hope you enjoy making them as much as I do—and even more, sharing them with those you care about. They're simple, sweet, and carry just enough nostalgia to become a favorite in your baking rotation, too.
Print
Classic Peanut Butter Blossoms Recipe
- Prep Time: 15 minutes
- Cook Time: 10 minutes
- Total Time: 25 minutes
- Yield: 24 cookies
- Category: Dessert
- Method: Baking
- Cuisine: American
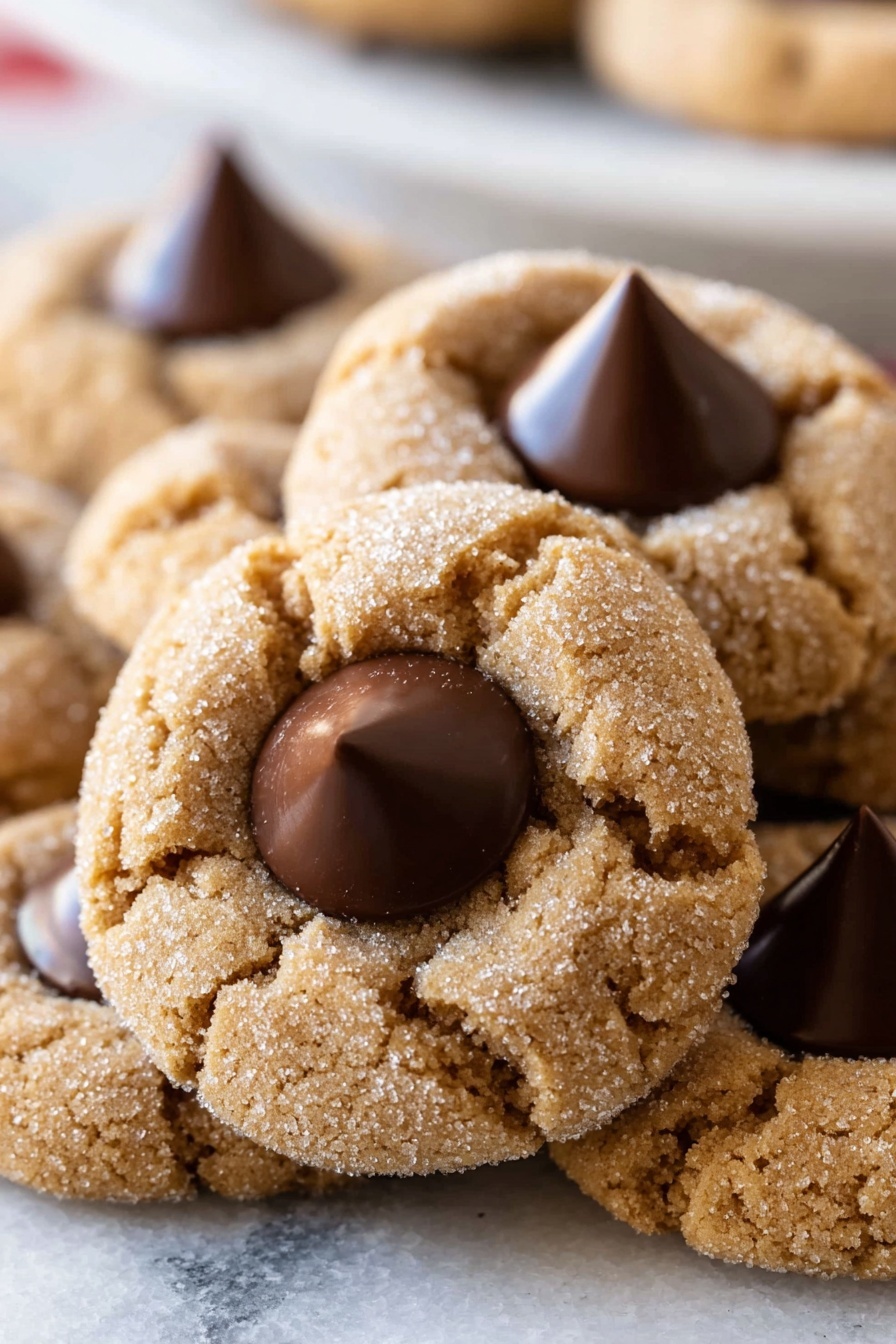
Description
Classic Peanut Butter Blossoms are delightful cookies featuring a soft peanut butter base topped with a signature chocolate kiss. These sweet treats combine the rich flavor of peanut butter with the melt-in-your-mouth texture of chocolate, perfect for any occasion or holiday baking.
Ingredients
Cookies
- ½ cup granulated sugar, plus extra for dusting
- ½ cup brown sugar, packed
- ½ cup creamy peanut butter
- ½ cup unsalted butter, softened
- 1 large egg, at room temperature
- 1 ½ cups all-purpose flour
- 1 teaspoon baking soda
- ½ teaspoon baking powder
- ¼ teaspoon salt
- 24 chocolate candy kisses, such as Hershey's
Instructions
- Preheat Oven: Preheat your oven to 375°F to prepare for baking the cookies.
- Mix Sugars and Wet Ingredients: In a large bowl, use an electric mixer on medium speed to blend the brown sugar, granulated sugar, creamy peanut butter, softened butter, and egg until the mixture is smooth and well combined.
- Add Dry Ingredients: Reduce the mixer speed to low and gradually add in the all-purpose flour, baking soda, baking powder, and salt, mixing until fully incorporated into a dough.
- Shape and Sugar Coat Dough: Form the dough into 1-inch balls, then roll each ball in granulated sugar to coat thoroughly.
- Arrange on Baking Sheet: Place the sugared dough balls on an ungreased baking sheet, spacing them about 2 inches apart to allow for spreading.
- Bake Cookies: Bake one sheet at a time in the preheated oven for 10 minutes or until the cookie edges turn a light golden brown.
- Add Chocolate Candy Kisses: Immediately upon removing the cookies from the oven, press one chocolate candy kiss into the center of each cookie.
- Cool Cookies: Transfer the cookies to a wire rack and let them cool for about 1 hour to allow the chocolate to set properly before serving.
Notes
- Make sure the egg is at room temperature to ensure proper mixing and texture.
- Roll the dough balls generously in granulated sugar for a nice sweet crust.
- Bake only one sheet at a time to ensure even baking because multiple sheets can cause uneven heat distribution.
- Use ungreased baking sheets for best results to help cookies spread properly and develop the right texture.
- Allow cookies to cool completely so the chocolate kisses harden without melting into the cookie.
- You can substitute creamy peanut butter with natural peanut butter, but expect a slightly different texture.
- Store cookies in an airtight container to maintain freshness for up to a week.
Nutrition
- Serving Size: 1 cookie
- Calories: 110 kcal
- Sugar: 9 g
- Sodium: 100 mg
- Fat: 6 g
- Saturated Fat: 2 g
- Unsaturated Fat: 3 g
- Trans Fat: 0 g
- Carbohydrates: 12 g
- Fiber: 1 g
- Protein: 3 g
- Cholesterol: 15 mg


Leave a Reply