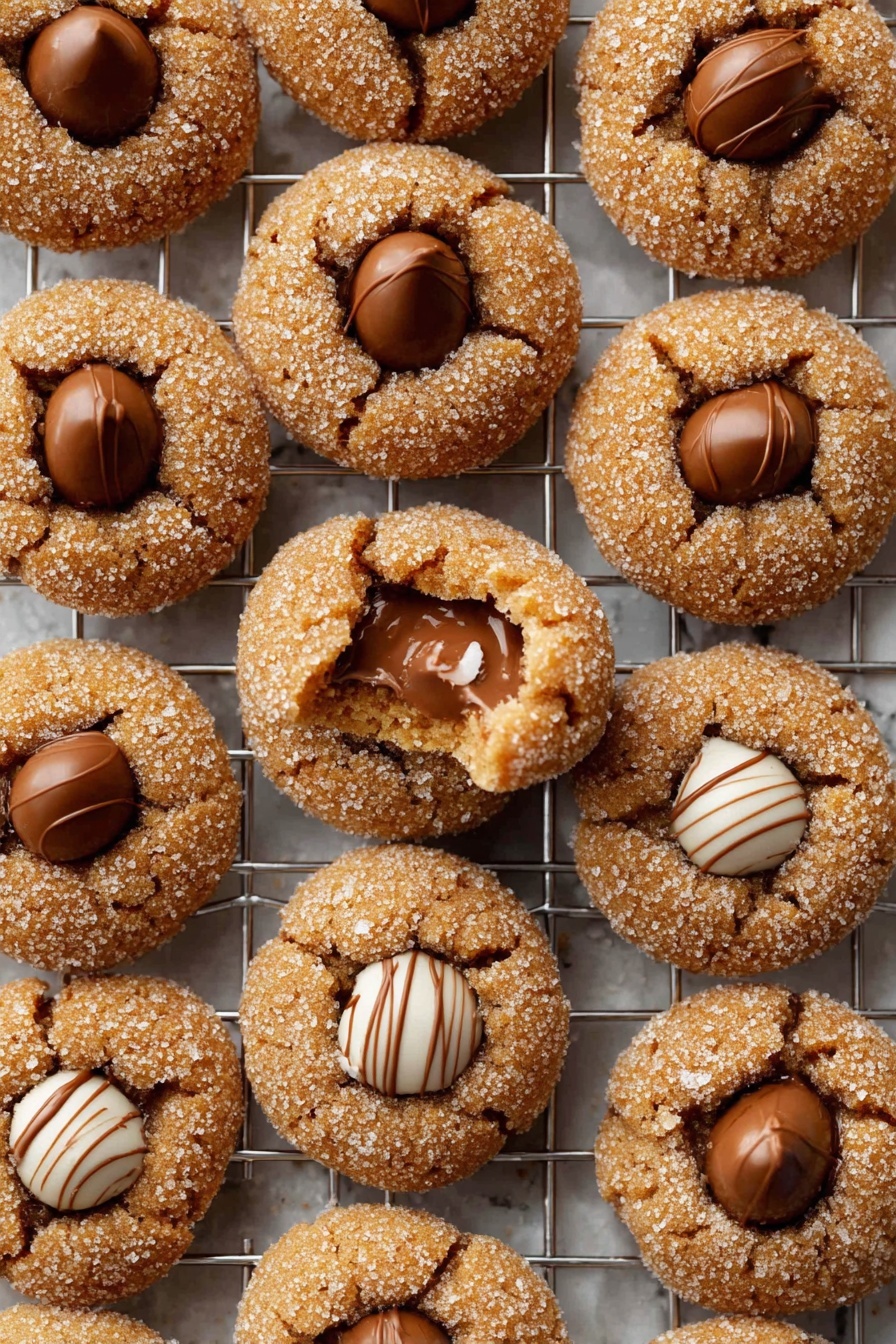
There's something utterly cozy about the warm spices paired with a melty chocolate center in these cookies. This Gingerbread Blossoms with Chocolate Kisses Recipe brings that perfect holiday nostalgia right to your kitchen, with a little sprinkle of sparkle on top. It’s a recipe I’ve grown to love for both its simplicity and the way it fills the house with that irresistible gingerbread aroma.

Jump to:
- Why You'll Love This Recipe
- Ingredients & Why They Work
- Make It Your Way
- Step-by-Step: How I Make Gingerbread Blossoms with Chocolate Kisses Recipe
- Top Tip
- How to Serve Gingerbread Blossoms with Chocolate Kisses Recipe
- Make Ahead and Storage
- Frequently Asked Questions:
- Final Thoughts
- Gingerbread Blossoms with Chocolate Kisses Recipe
Why You'll Love This Recipe
I’ve made many gingerbread cookies over the years, but there’s something about these Gingerbread Blossoms with Chocolate Kisses Recipe cookies that just wins hearts (and taste buds). The chewy, spiced cookie base combined with the gooey chocolate center makes them a festive classic you’ll want to make time and again.
- Perfectly balanced spices: Each cookie bursts with warm ginger, cinnamon, and a hint of cloves without overpowering the chocolate center.
- Textural delight: The sugar coating adds a delightful crunch before you bite into the soft, tender cookie.
- Easy but impressive: These cookies look like you spent hours baking but are surprisingly simple to whip up with basic pantry ingredients.
- Family favorite: Everyone from kids to grandparents loves these, making them the perfect cookie to bring out for gatherings or holiday parties.
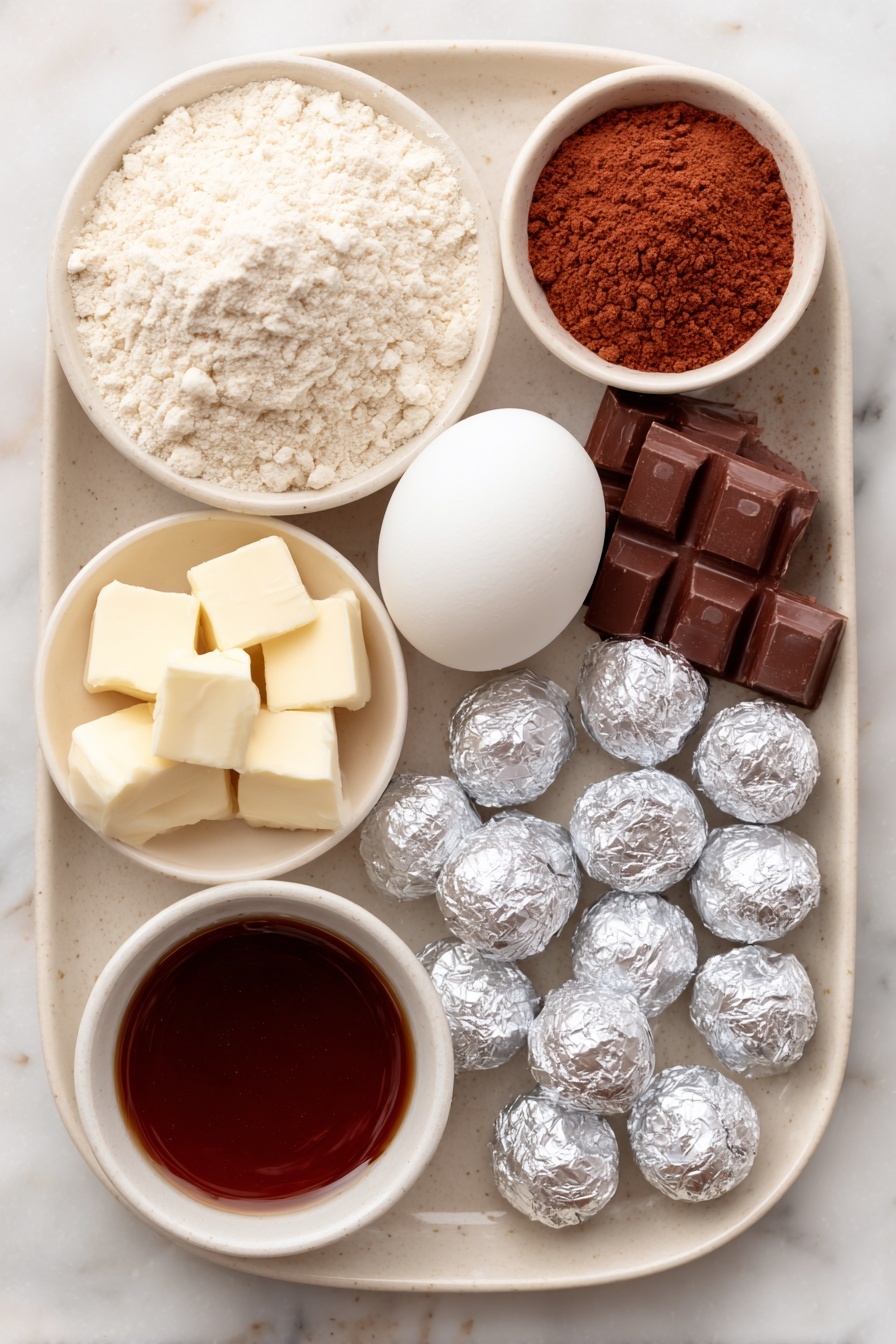
Ingredients & Why They Work
Each ingredient in this Gingerbread Blossoms with Chocolate Kisses Recipe plays a starring role. I love how the molasses brings that deep, rich sweetness while the assortment of warm spices makes each bite fragrant and cozy. Picking high-quality spices and molasses really elevates this cookie beyond the everyday.
- All-purpose flour: The sturdy base that gives these cookies structure without getting tough.
- Baking soda: Helps the cookies rise just enough to be soft and chewy, not cakey.
- Ground ginger: The star spice adding sharp warmth and signature gingery flavor.
- Ground cinnamon: Adds sweetness and depth to the spice blend.
- Ground cloves, allspice, nutmeg: These spices build complexity, making the flavor layered and inviting.
- Salt: Balances all the sweetness and enhances the spice aromas.
- Unsalted butter: Provides richness and tenderness; I always use good quality, room temp butter.
- Brown sugar: Adds moisture and that caramel-like flavor I adore in gingerbread cookies.
- Molasses: The soul of this recipe! I prefer dark molasses for its robust flavor, and I avoid blackstrap because it's too bitter.
- Egg: Binds everything together while lending a soft texture.
- Vanilla extract: Rounds out the spice notes and adds warmth.
- Granulated or coarse sugar: For rolling the dough balls, giving a sparkling crunchy coating.
- Hershey’s Kisses or Hugs: The chocolate center that melts perfectly and adds the wow factor.
Make It Your Way
One of the best parts about this Gingerbread Blossoms with Chocolate Kisses Recipe is how easily you can tailor it to your taste or dietary needs. I often swap in white chocolate Hugs for a creamier twist or sometimes add a pinch more ginger if I want it extra zippy.
- Variation: I’ve tried rolling some dough balls in finely chopped nuts or cinnamon sugar instead of plain sugar for a fun texture and flavor change—both are hits!
- Dairy-free option: Use vegan butter and check your chocolate for dairy-free varieties; it works surprisingly well.
- Spice level: Feel free to tweak spices by adding more ginger or swapping nutmeg for cardamom if you like.
Step-by-Step: How I Make Gingerbread Blossoms with Chocolate Kisses Recipe
Step 1: Gather everything and prep your baking sheets
Preheat your oven to 350°F (177°C) and line baking sheets with parchment paper or silicone mats. This sets you up for perfect baking and easy cleanup. I always line two sheets ahead of time so I can bake batches back-to-back without waiting.
Step 2: Mix your dry ingredients
Whisk together the flour, baking soda, ground ginger, cinnamon, cloves, allspice, nutmeg, and salt in a medium bowl. I love taking a moment here to smell the spice mix—it’s like the first breath of holiday cheer in the kitchen!
Step 3: Cream your butter and sugar
Using a handheld or stand mixer with a paddle attachment, beat the softened butter and brown sugar together on medium-high speed until creamy and fluffy—about 3 minutes. This step is key because it traps air and makes your cookies nice and tender. A quick tip: If you need a visual, there are plenty of creaming butter tutorials online I often check out.
Step 4: Add molasses, egg, and vanilla
Mix in the molasses, egg, and vanilla until just combined. The mixture may look a little curdled here, which is normal, so don’t worry! Just scrape down the bowl to make sure everything blends smoothly.
Step 5: Combine dry and wet ingredients
Turn your mixer to low and add the flour-spice mix slowly. The dough will be thick and a bit sticky, which is exactly what you want. Resist the urge to overmix; just enough to combine is perfect for tender cookies.
Step 6: Shape and sugar-coat the dough balls
Scoop about 1.5 tablespoons of dough and roll into balls. Roll each ball in granulated or coarse sugar for a sparkling crunch. Space your cookies at least 2 inches apart on the sheet—this keeps them from merging during baking.
Step 7: Bake until edges are set
Bake for 12 minutes or until the edges just begin to look set but the centers are still soft. It’s okay if they look slightly underbaked in the middle; they firm up as they cool. I always watch closely because ovens can vary.
Step 8: Press in the chocolate and chill
Right after you pull the cookies from the oven, transfer them carefully using a thin spatula to a smaller tray that fits in your freezer. Press a Hershey’s Kiss or Hug into the center of each cookie—you want to do this while they’re warm so the chocolate melts slightly. Then pop the tray into the freezer for 10 minutes to help the chocolate set quickly and keep its shape.
Step 9: Enjoy and store!
After chilled, these cookies are ready to enjoy. Store any leftovers in an airtight container at room temperature for up to a week, though I bet they won’t last that long!
Top Tip
From baking these Gingerbread Blossoms with Chocolate Kisses countless times, here are my game-changing tips to make your batch outstanding every time.
- Don’t skip chilling the dough: If you have time, chilling the dough for a few hours or even overnight helps the flavors meld and prevents spreading.
- Use room temperature ingredients: This helps the butter cream up beautifully with sugar for a light texture.
- Handle chocolate timing carefully: Press the chocolate kiss in the cookie right after baking and warm; it melts beautifully and then resetting in the freezer keeps its shape intact.
- Baking sheets matter: I recommend silicone mats or parchment paper to prevent sticking and give even baking.
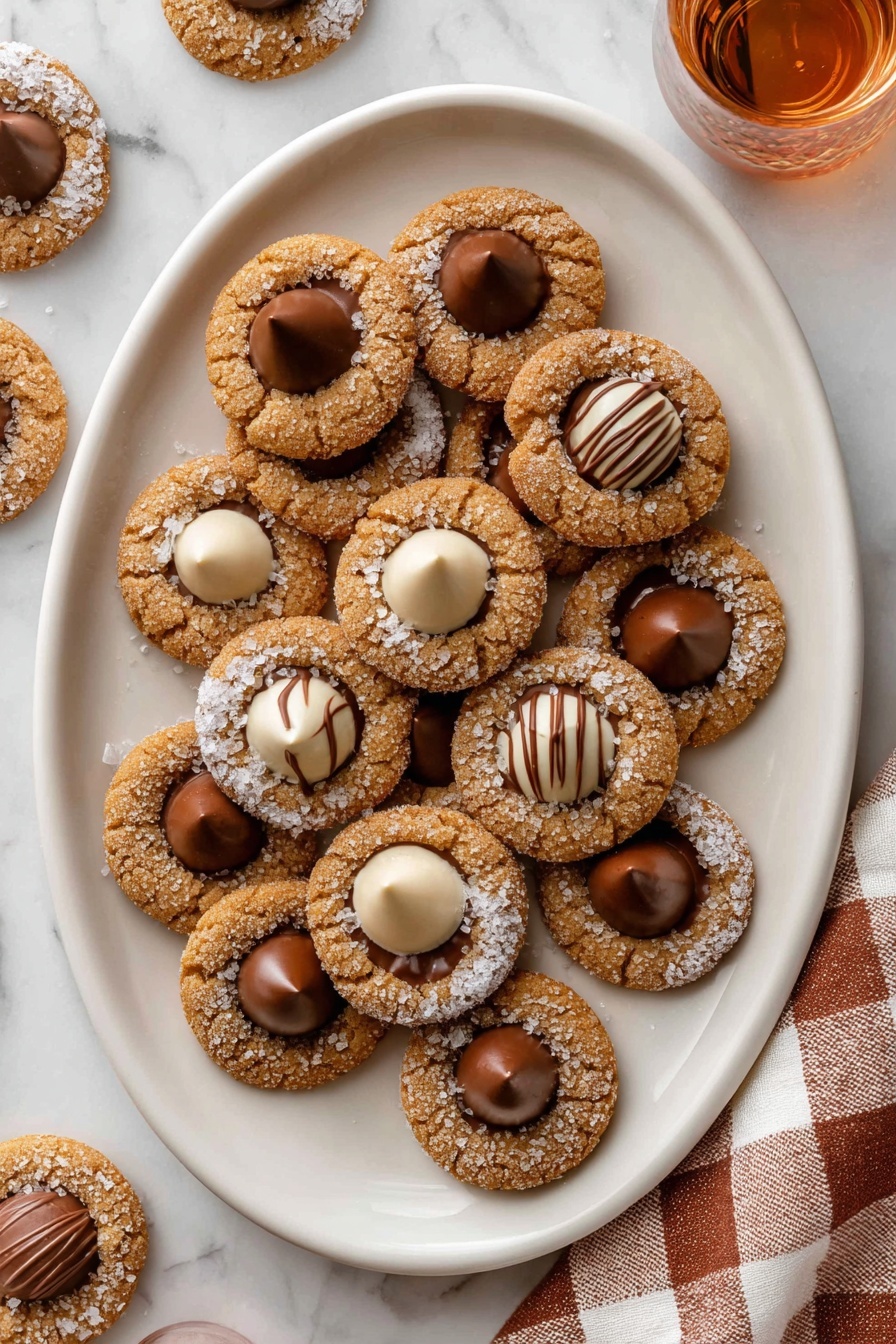
How to Serve Gingerbread Blossoms with Chocolate Kisses Recipe
Garnishes
I like to sprinkle a little extra coarse sugar on top just before baking for sparkle and crunch. For the holidays, a light dusting of powdered sugar after baking adds a snowy effect that’s always a crowd-pleaser.
Side Dishes
These cookies go wonderfully with hot cocoa or mulled cider, making them an excellent treat for winter gatherings. They also pair nicely with spiced tea or coffee for an afternoon cozy-up.
Creative Ways to Present
For parties, I love arranging these cookies on a festive platter lined with holly or pine sprigs. You could also stack them in a jar or create cookie gift boxes with ribbon and a handwritten note for a personal touch.
Make Ahead and Storage
Storing Leftovers
I store leftover cookies in a tightly sealed container at room temperature. Lining the container with parchment paper keeps them from sticking and maintains their sugar-crunch charm. Usually, they stay fresh and soft up to 7 days, though they rarely last that long in my house!
Freezing
You can freeze these cookies after baking or even freeze unbaked dough balls. For baked cookies, I suggest placing parchment sheets between layers in an airtight container. They freeze beautifully for up to 3 months. When freezing dough balls, take them straight from freezer to oven—add a minute or two to the bake time. This tip saved me many times when I needed fresh cookies on a short notice.
Reheating
To reheat, pop the cookies in a preheated oven at 300°F for about 5 minutes. This revives the soft centers and gives the chocolate a subtle melty glow again without overheating or drying them out.
Frequently Asked Questions:
Absolutely! You can bake the cookies as directed and simply skip pressing in the chocolate kisses at the end. They are just as delicious plain or you can try adding chocolate chips or butterscotch morsels instead for a twist.
I recommend using dark molasses (like Grandma’s brand) as it has a rich flavor without bitterness. Avoid blackstrap molasses here because it tends to be a bit too strong and harsh for cookies like these.
Yes! You can freeze the cookie dough balls for up to 3 months. When you’re ready to bake, just pop the frozen dough balls straight onto the baking sheet and add an extra minute or two to the baking time—no thawing needed.
Freezing the cookies after pressing in the chocolate helps the chocolate set firmly and keeps its shape instead of melting too much and running. It also lets the cookies cool properly while locking in that pretty kiss shape on top.
Final Thoughts
I keep coming back to this Gingerbread Blossoms with Chocolate Kisses Recipe because it never fails to deliver that perfect combo of spice, sweetness, and melty chocolate magic. Whether baking for holiday gatherings or a cozy night in, these cookies bring that special touch everyone appreciates. Give it a try—you might just find it becomes your go-to festive treat, too.
Print
Gingerbread Blossoms with Chocolate Kisses Recipe
- Prep Time: 25 minutes
- Cook Time: 12 minutes
- Total Time: 45 minutes
- Yield: 30 cookies
- Category: Dessert
- Method: Baking
- Cuisine: American
- Diet: Vegetarian
Description
Delicious and festive Gingerbread Blossoms featuring a soft gingerbread cookie rolled in sugar, baked to perfection and topped with a melting chocolate kiss in the center for a perfect holiday treat.
Ingredients
Dry Ingredients
- 3 cups (375g) all-purpose flour (spooned & leveled)
- 1 teaspoon baking soda
- 2 teaspoons ground ginger
- 1 and ¼ teaspoons ground cinnamon
- ¼ teaspoon ground cloves
- ¼ teaspoon ground allspice
- ¼ teaspoon ground nutmeg
- ¼ teaspoon salt
Wet Ingredients
- ¾ cup (12 Tbsp; 170g) unsalted butter, softened to room temperature
- ¾ cup (150g) packed light or dark brown sugar (dark preferred)
- 6 Tablespoons (128g) unsulphured or dark molasses
- 1 large egg, at room temperature
- 1 teaspoon pure vanilla extract
For Rolling and Topping
- ½ cup (100g) granulated sugar or coarse sparkling sugar for rolling
- 30 Hershey’s Kisses or Hugs, unwrapped
Instructions
- Preheat Oven and Prepare Baking Sheets: Preheat oven to 350°F (177°C). Line large baking sheets with parchment paper or silicone baking mats and set aside.
- Mix Dry Ingredients: In a medium bowl, whisk together the flour, baking soda, ground ginger, cinnamon, cloves, allspice, nutmeg, and salt. Set aside.
- Cream Butter and Sugar: In a large bowl using a handheld or stand mixer fitted with a paddle attachment, beat the softened butter and brown sugar on medium-high speed for about 3 minutes until creamy and well combined.
- Add Molasses, Egg, and Vanilla: Add the molasses, egg, and vanilla extract to the butter mixture and beat until combined, about 1 minute, scraping down the sides and bottom as needed. The mixture may look slightly curdled, which is normal.
- Combine Wet and Dry Ingredients: Slowly add the flour mixture to the wet ingredients, mixing on low speed until just combined to form a thick dough.
- Form Dough Balls and Roll in Sugar: Scoop the dough into balls of about 1.5 tablespoons (30g) each. Roll each ball in granulated or coarse sugar, then place on prepared baking sheets spaced at least 2 inches apart.
- Bake the Cookies: Bake the cookies for 12 minutes or until the edges appear set.
- Cool on Baking Sheet: Remove from the oven and let cookies cool on the baking sheet for 5 minutes.
- Press Chocolate and Freeze: Transfer the cookies to a smaller tray or plate that can fit in your freezer. Press one unwrapped Hershey’s Kiss or Hug candy into the center of each cookie and place the tray in the freezer for 10 minutes to quickly set the chocolate.
- Serve and Store: Remove from freezer and serve. Store any leftover cookies in an airtight container at room temperature for up to 1 week.
Notes
- You can make the cookie dough up to 3 days ahead and store it refrigerated. Let it sit at room temperature for 30 minutes before shaping.
- Baked cookies freeze well for up to 3 months. Unbaked dough balls also freeze well for 3 months; bake frozen dough balls for 13 minutes (1 minute longer).
- Use coarse sugar for rolling to add extra crunch and sparkle; regular granulated sugar works fine as well.
- Regular chocolate Kisses hold their shape best, while white chocolate Hugs melt faster, so freezing quickly is important.
- To make these cookies without the chocolate center, simply bake as directed and omit pressing in candy at the end.
- You can substitute chocolate kisses with chocolate chips, white chocolate morsels, or butterscotch chips for variety.
- Use parchment paper or silicone baking mats to prevent sticking and ensure even baking.
Nutrition
- Serving Size: 1 cookie
- Calories: 150 kcal
- Sugar: 12 g
- Sodium: 80 mg
- Fat: 7 g
- Saturated Fat: 4 g
- Unsaturated Fat: 3 g
- Trans Fat: 0 g
- Carbohydrates: 20 g
- Fiber: 1 g
- Protein: 1 g
- Cholesterol: 20 mg


Leave a Reply