There’s something utterly satisfying about the rich, silky texture and deep flavor of a perfectly made gravy. This Homemade Turkey Gravy from Drippings Recipe transforms those golden pan juices into a luscious sauce that will elevate every bite of your turkey. Trust me, once you taste this, you’ll wonder how you ever settled for anything less.

Jump to:
- Why You'll Love This Recipe
- Ingredients & Why They Work
- Make It Your Way
- Step-by-Step: How I Make Homemade Turkey Gravy from Drippings Recipe
- Top Tip
- How to Serve Homemade Turkey Gravy from Drippings Recipe
- Make Ahead and Storage
- Frequently Asked Questions:
- Final Thoughts
- Homemade Turkey Gravy from Drippings Recipe
Why You'll Love This Recipe
I’ve made countless gravies over the years, but this Homemade Turkey Gravy from Drippings Recipe feels like a warm hug every time. It’s all about coaxing out those savory turkey flavors and balancing them with a smooth, rich texture—so rewarding to get just right.
- Deep flavor: Using actual turkey drippings gives your gravy an authentic, rich taste you can’t fake with broth alone.
- Velvety texture: The golden roux cooks slowly for just the right thickness and smoothness—no lumps, no worries.
- Flexible seasoning: You can easily adjust herbs and spices to match your mood or the rest of your meal.
- Impresses every time: Whether it’s a holiday roast or a casual dinner, this gravy elevates your turkey like nothing else.
Ingredients & Why They Work
Each ingredient here has a starring role, working together to build a gravy that’s both flavorful and perfectly textured. Plus, I always find it helps to use fresh turkey drippings for that unbeatable flavor, but you can absolutely adapt depending on what you have on hand.
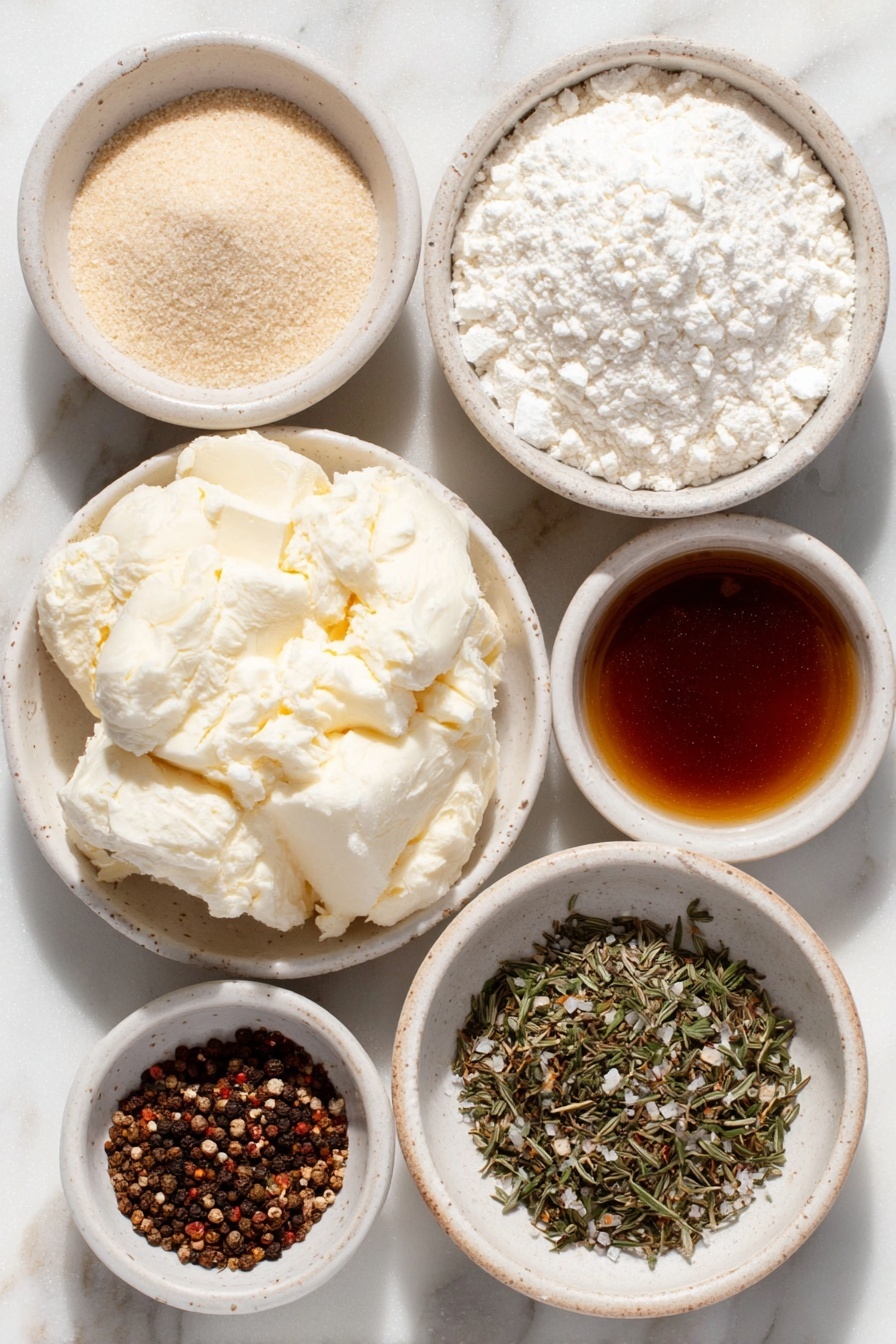
- Unsalted butter: The base fat for your roux, letting you control salt levels and develop that nutty flavor.
- Flour: Thickens the gravy; cooking it slowly prevents lumps and adds a lovely golden color.
- Turkey drippings: The star ingredient, imparting a rich depth you simply can’t replicate with broth.
- Water: Used to adjust the volume of liquid if your drippings aren’t enough.
- Granulated chicken bouillon (optional): Great as a seasoning booster if your drippings aren’t salty enough or if you want a punch of flavor.
- Seasonings (dried parsley, garlic powder, onion powder, thyme, sage, rosemary, pepper): Layered herbs and spices that transform the gravy from good to unforgettable.
Make It Your Way
One of the things I love about this Homemade Turkey Gravy from Drippings Recipe is how easy it is to tweak. Whether you want it herb-forward, a touch spicier, or even dairy-free (substitute butter for olive oil or turkey fat), you can customize it to your taste.
- Variation: I sometimes add a splash of white wine or a dash of soy sauce for extra umami—just a little goes a long way in boosting complexity.
- Dairy-free version: Use rendered turkey fat or olive oil instead of butter to keep it silky without dairy.
- Thicker or thinner gravy: Control the thickness by adjusting how long you simmer it or by adding a little extra water or broth to thin it out.
- Herb adjustments: Don’t hesitate to swap or omit seasonings based on your preference. Fresh herbs work well, but remember to reduce amounts as dried herbs are more potent.
Step-by-Step: How I Make Homemade Turkey Gravy from Drippings Recipe
Step 1: Strain and Degrease Those Drippings
After roasting your turkey, pour the pan drippings (both solids and liquid) through a fine mesh sieve into a fat separator or a large freezer bag. Let it sit for a few minutes so the fat rises to the top. If you’re using a freezer bag, cut a tiny corner and let the leaner juices drain into a measuring cup. This step is key to avoiding a greasy gravy—it’s what really sets homemade gravy apart from store-bought.
Step 2: Make a Golden Roux
Melt unsalted butter in a heavy saucepan over medium-low heat. Whisk in the flour and cook for about 4-5 minutes, stirring constantly. Don't rush this part—waiting for the roux to turn a deep golden brown adds that rich, toasty flavor and keeps lumps at bay.
Step 3: Whisk in Your Drippings Slowly
Lower the heat and slowly pour in your strained turkey drippings, whisking the whole time to blend smoothly. Keep adding water if needed to reach four cups of liquid total. This gradual mixing keeps lumps from forming and coats the starch in the roux for that beautiful silkiness.
Step 4: Simmer and Season
Bring the mixture to a gentle simmer and cook, whisking often, until thickened—about 6-8 minutes. Taste frequently and add salt or granulated chicken bouillon a little at a time, along with your chosen herbs and spices. This is your gravy’s flavor moment, so adjust patiently until it sings.
Step 5: Keep Warm and Serve
Gravy thickens as it cools, so keep it on very low heat until you’re ready to serve. Stir often and have a bit of water handy to thin it if it gets too thick. I swear by an insulated gravy jug to keep the gravy warm and silky on the table.
Top Tip
From my many gravy-making adventures, I’ve learned that patience pays off. Rushing any part—especially the roux or the whisking in of drippings—can lead to lumps or a flat flavor. Those little details make a world of difference.
- Take your time with the roux: Cooking flour in butter until it's deeply golden fully develops flavor and prevents that raw flour taste.
- Careful fat removal: Removing excess fat is not wasting flavor—too much fat makes gravy greasy and weirdly textured.
- Season gradually: Add salt, bouillon, and herbs bit by bit and taste after each addition to nail the perfect balance.
- Keep whisking: Constant whisking while adding liquids stops lumps and keeps the gravy smooth all the way.
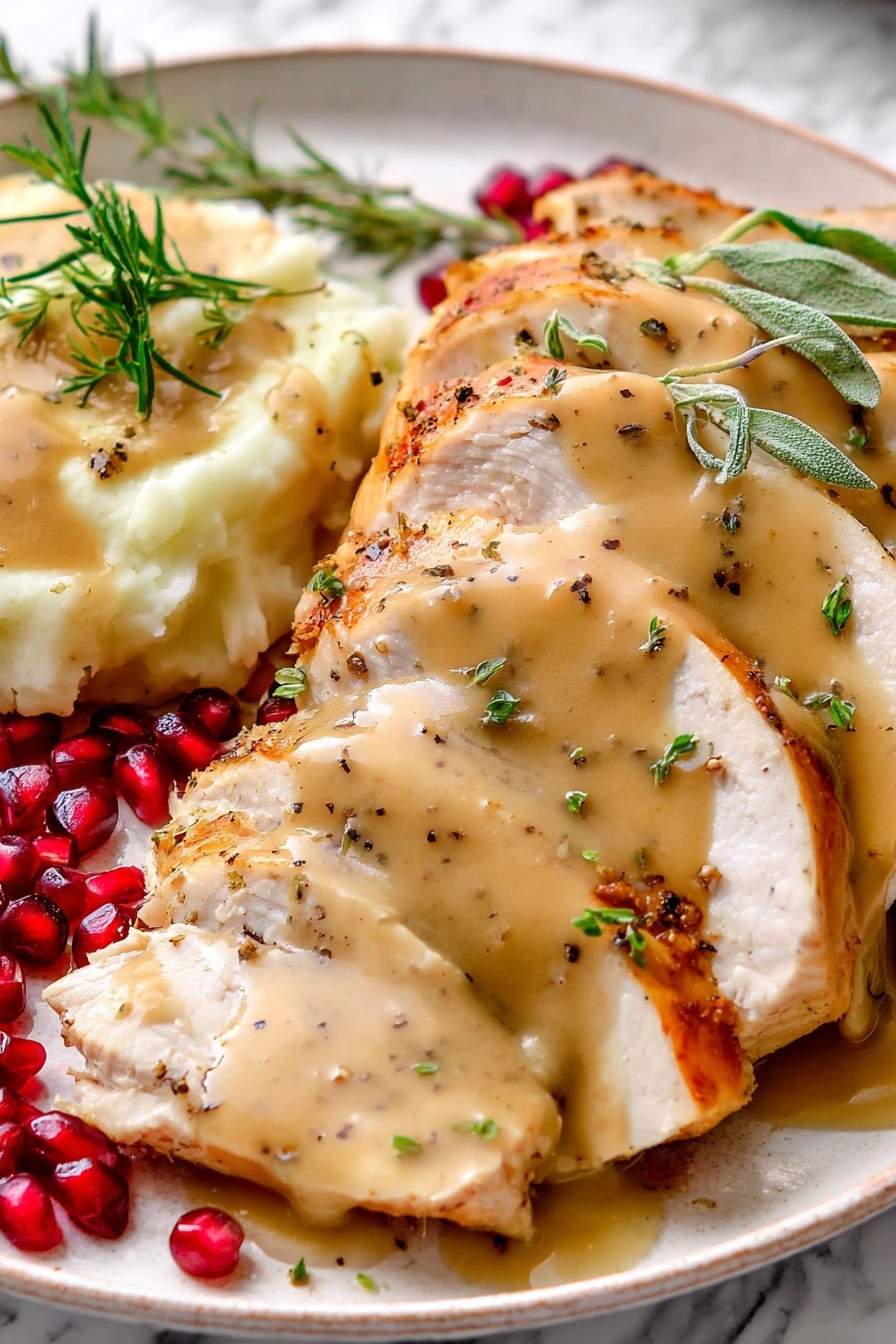
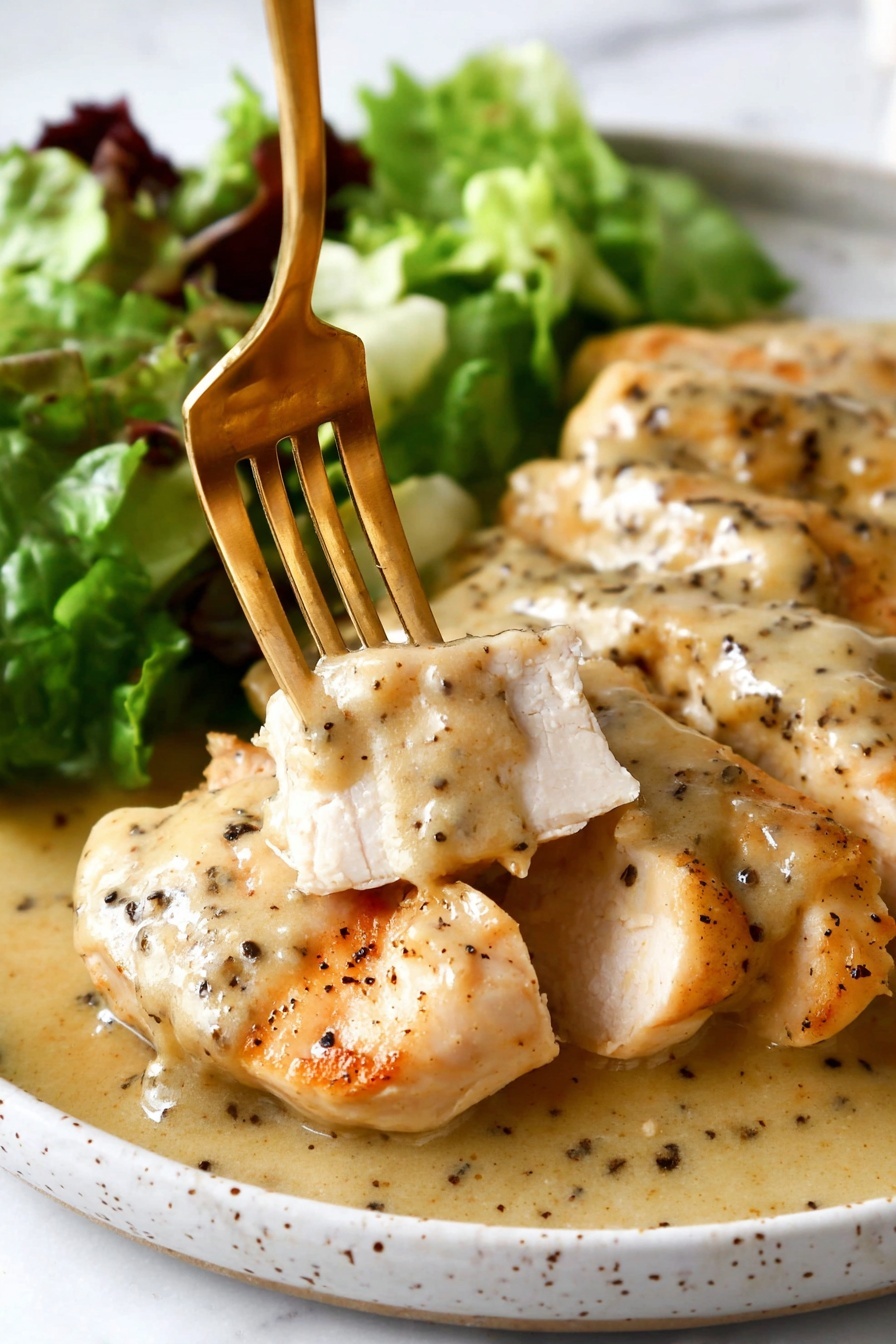
How to Serve Homemade Turkey Gravy from Drippings Recipe
Garnishes
I typically keep garnishes simple—a sprinkle of fresh chopped parsley brightens up the gravy’s deep tones and adds a pop of color on the plate. Sometimes I toss in a few fresh thyme leaves for that aroma that makes everyone lean in for a taste before they even try the turkey.
Side Dishes
This gravy pairs like a dream with classic mashed potatoes, roasted root vegetables, and a buttery dinner roll for sopping up every last drop. For me, it’s the ultimate holiday plate enhancer!
Creative Ways to Present
For a special occasion, I love serving this gravy in a rustic ceramic gravy boat surrounded by fresh herbs. It makes the whole spread look inviting and homemade, plus guests love helping themselves—gravy on demand is always a hit!
Make Ahead and Storage
Storing Leftovers
After the meal, I transfer leftover gravy to an airtight container and pop it in the fridge. It stays good and tasty for up to 4 days, which is perfect for enjoying turkey sandwiches or reheated dinners.
Freezing
If I want to keep it longer, freezing is my go-to. I squeeze excess air from freezer bags before sealing, then thaw fully overnight in the fridge. It freezes beautifully without changing texture or flavor.
Reheating
To reheat, I gently warm the gravy in a saucepan over low-medium heat, whisking in a splash of water to bring it back to that silky consistency. It rarely needs more seasoning, but I always give it a quick taste before serving.
Frequently Asked Questions:
Yes! You can prepare the gravy a day ahead and keep it refrigerated. Just reheat gently with a little water to loosen the texture before serving.
If you don’t have enough drippings, supplement with water or low-sodium chicken broth to make up the total liquid. You might want to add a bit more seasoning to compensate for the lighter flavor.
The key to lump-free gravy is cooking your roux slowly until golden and whisking the drippings in gradually over low heat. Constant whisking and patience are your best friends.
Absolutely! This homemade gravy freezes very well. Just let it cool completely, store it in an airtight container or freezer bag, and thaw overnight in the fridge when ready to use.
Final Thoughts
This Homemade Turkey Gravy from Drippings Recipe isn’t just a sauce—it’s a labor of love that truly honors your roast turkey. The blend of rich drippings, golden roux, and carefully layered seasonings results in a gravy I look forward to every year. I’m excited for you to make it your own and see just how transformative a good gravy can be for your meals. Give it a try—you’ll feel like you’re serving something truly special, every time.
Print
Homemade Turkey Gravy from Drippings Recipe
- Prep Time: 5 minutes
- Cook Time: 15 minutes
- Total Time: 20 minutes
- Yield: 2.5 cups
- Category: Sauce
- Method: Stovetop
- Cuisine: American
Description
This homemade turkey gravy recipe uses flavorful turkey drippings or a chicken broth base to create a rich, smooth gravy perfect for complementing your roasted turkey. The recipe provides steps to make gravy both with and without turkey drippings, using a roux made from butter and flour and seasoned to taste with herbs and bouillon for the ideal poultry pairing.
Ingredients
Turkey Gravy with Drippings
- 6 tablespoons unsalted butter
- ⅓ cup plus 1 tablespoon flour
- 4 cups turkey drippings plus water as needed
- Granulated chicken bouillon, as needed (optional)
- Seasonings as needed (dried parsley, garlic powder, onion powder, dried thyme, ground sage, dried minced rosemary, pepper, salt)
Turkey Gravy without Drippings
- 6 tablespoons unsalted butter
- ⅓ cup plus 1 tablespoon flour
- 4 cups reduced sodium chicken broth
- 1 teaspoon chicken bouillon (granulated, crushed cube or base)
- 1 teaspoon dried parsley
- ½ teaspoon garlic powder
- ¼ teaspoon onion powder
- ¼ teaspoon dried thyme
- ¼ teaspoon pepper
- ⅛ teaspoon ground sage
- ⅛ teaspoon dried minced rosemary
- Salt to taste
Instructions
- Strain the Drippings: Strain the turkey drippings from the roasting pan through a fine mesh sieve into a fat separator or a large freezer bag, discarding solids caught in the sieve.
- Degrease Drippings: Let the drippings sit for a few minutes to allow fat to separate. If using a freezer bag, seal and hold it pointing down into a measuring cup, making a small cut in the corner to pour out liquid without fat until 4 cups are obtained.
- Adjust Liquid Volume: Add water if needed to bring the volume of drippings to 4 cups.
- Make Roux: Melt butter in a large saucepan over medium-low heat. Add flour and cook for 4-5 minutes, whisking constantly until deeply golden, to prevent lumps and develop flavor.
- Add Liquid and Whisk: Reduce heat to low and slowly whisk in the turkey drippings (or broth if making gravy without drippings) until smooth and no lumps remain.
- Simmer Until Thickened: Bring mixture to a simmer while whisking constantly, and continue simmering for 6-8 minutes until desired thickness is achieved. If gravy thickens too much, whisk in water gradually to adjust consistency.
- Season to Taste: Taste the gravy and season with granulated chicken bouillon gradually, then add dried herbs and spices (parsley, garlic powder, onion powder, thyme, sage, rosemary, pepper) as desired. Add salt carefully as needed.
- Keep Warm: Keep gravy warm over low heat, stirring often until ready to serve. Use an insulated gravy jug if available to maintain smoothness and temperature.
- Thin as Needed Before Serving: If the gravy thickens upon cooling, gently reheat over medium-low heat and whisk in additional water to reach the ideal consistency.
Notes
- Store leftover gravy in an airtight container in the refrigerator for up to 4 days.
- Freeze gravy in airtight containers or freezer bags with excess air removed for up to 3 months; thaw overnight in the refrigerator before reheating.
- Reheat gravy gently in a saucepan, adding water as needed to loosen the thickness and whisk until smooth.
- Do not shortcut the roux cooking step because the deep golden color prevents lumps and enhances flavor.
- Use an insulated gravy jug to keep gravy smooth and warm until serving.
- Adjust seasoning gradually since turkey drippings vary in saltiness depending on how your turkey was prepared.
Nutrition
- Serving Size: ¼ cup
- Calories: 70 kcal
- Sugar: 0 g
- Sodium: 150 mg
- Fat: 5 g
- Saturated Fat: 3 g
- Unsaturated Fat: 2 g
- Trans Fat: 0 g
- Carbohydrates: 6 g
- Fiber: 0 g
- Protein: 1 g
- Cholesterol: 15 mg


Leave a Reply